PART ll - Tips for DIY Bug Net Frame

Building a DIY Bug Net Frame: A Thrifty Guide
When it comes to camping, one thing I absolutely can’t stand is bugs crawling on me in the middle of the night. That’s why I’ve made it my mission to perfect a DIY bug net frame that’s both practical and cost-effective. This post will walk you through an updated method for creating a bug net frame that requires fewer materials and is easier on the wallet.
Why Build a Bug Net Frame?
Bugs are an inevitable part of camping, especially in those classic open A-frame canvas tents that many summer camps use. While these tents do a great job keeping rain off, they’re no match for mosquitoes and other creepy crawlers. Investing in a bug net and frame is a game-changer—you can sleep soundly without waking up covered in bites. Plus, building your own frame teaches valuable lessons in thriftiness, planning, and adaptability—principles that every Scout should learn.
A New Approach to the Frame
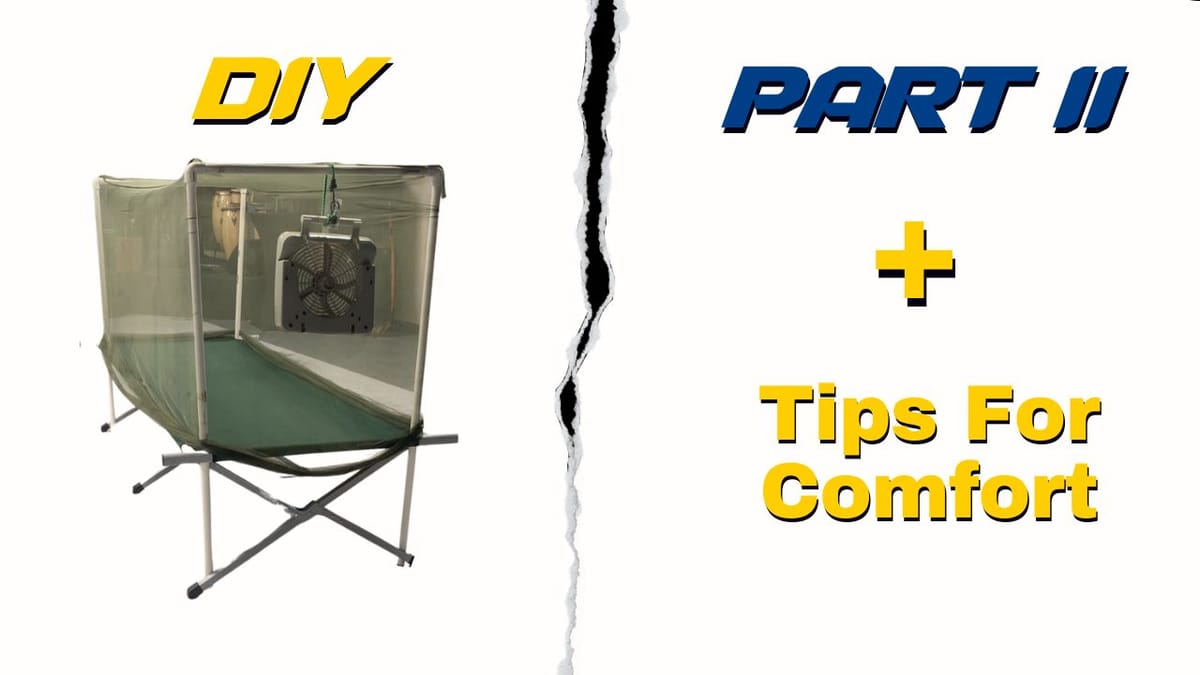
In this method, the frame design is simplified. Instead of using sidebars like in my earlier model, this version relies on the cot’s legs to create tension for the net. It works perfectly with aluminum cots measuring about 6 feet 10 inches long. These cots are incredibly durable—I’ve been using mine for over 20 years.
The simplified frame is lighter, cheaper, and just as effective. You’ll need about two 10-foot PVC pipes and a few corner fittings. The total cost comes out to around $10 for the pipes, with fittings costing less than a dollar each. The netting itself costs around $7, making this a budget-friendly project.
Step-by-Step Instructions
- Measure and Cut the Pipes: Depending on your desired frame height, cut the PVC pipes accordingly. If you want enough headroom to sit up, aim for about 42 inches in height.
- A 10-foot pipe can be cut into multiple pieces to minimize waste.
- Assemble the Frame: Use corner fittings to connect the pipes. Ensure that the cot’s legs are positioned inside the frame for added stability. The tension created by the legs keeps the frame sturdy without needing sidebars.
- Attach the Netting: Drape the netting over the frame and secure it by tucking it under your sleeping mat. This helps seal any gaps where bugs might sneak in. Be mindful of sharp edges on the PVC that could snag the netting—a quick filing or some careful handling can prevent tears.
Pro Tips and Tricks
- Avoid Snags: The netting is delicate, so watch out for rough edges on the pipes. Filing down sharp spots can save you from accidental holes.
- Use a Sleeping Pad: A Therm-a-Rest self-inflating pad is a great addition to your setup. It’s lightweight, compact, and adds a layer of comfort.
- Add a Fan for Comfort: To keep cool, use a battery-powered fan. Attach it to the crossbar with a bungee cord—an easy way to stay comfortable on warm nights.
Lessons for Scouts
This project is a fantastic learning opportunity for Scouts. It teaches them how to:
- Be thrifty by finding cost-effective solutions.
- Adapt to unexpected challenges, like realizing you’ve miscalculated pipe lengths.
- Use tools safely and effectively, such as pipe cutters and measuring tapes.
Final Thoughts
Creating your own bug net frame is a rewarding project that combines practicality with important life skills. Not only will you enjoy bug-free nights, but you’ll also gain a sense of accomplishment from building something yourself. Plus, this setup is spacious enough for Scouts to play cards or relax without any pesky interruptions.
So grab your tools, head to the hardware store, and let’s go Scouting America!