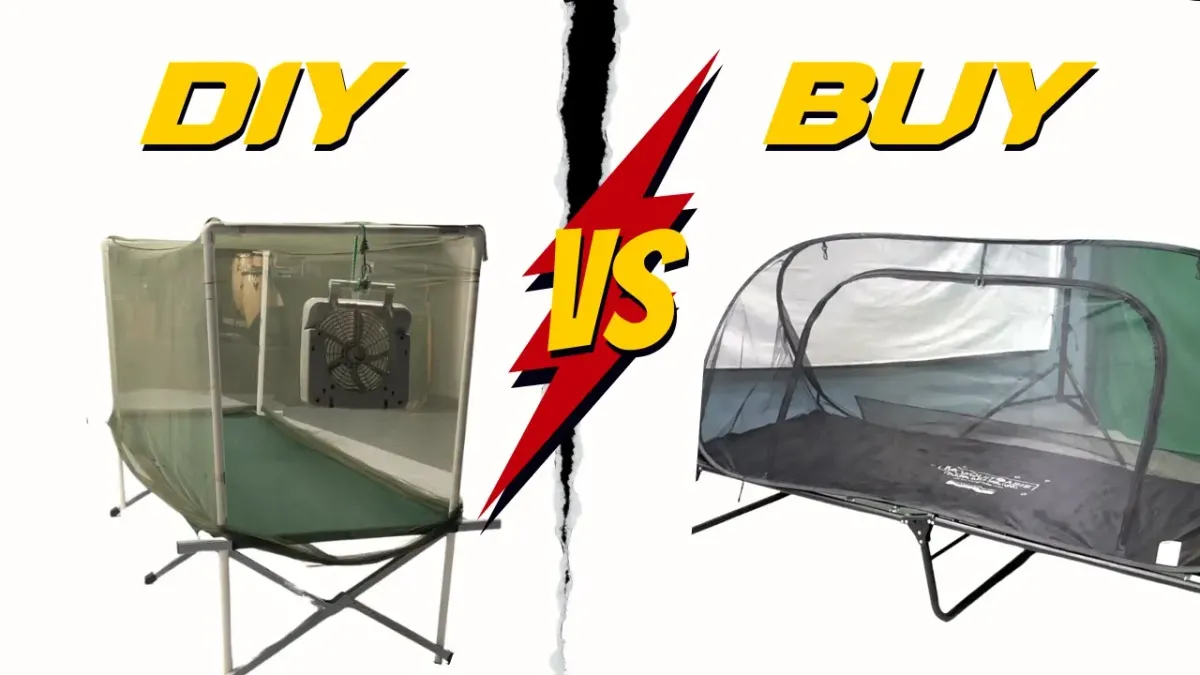
DIY Your Own Bug Net VS Buying

Building a Bug Net Frame: A Scouting Adventure
Let’s face it: bugs crawling on you in the middle of the night are no one’s idea of fun. That’s why I’m dedicating this episode to building a bug net frame—an essential piece of gear for any scout or camper who wants to enjoy a bug-free night. Along the way, we’ll learn two key lessons: how to be thrifty (a principle of the Scout Law) and how to adapt when plans change unexpectedly. After all, being prepared to adjust is a life skill everyone needs.
Why do we even need a bug net? Every summer camp I’ve attended uses those open A-frame canvas tents. While they’re great for keeping rain off, they’re useless against bugs. Last summer was the first time I brought a bug net, and it was a game-changer. No mosquito bites, no creepy crawlers, just peaceful sleep. However, pre-made bug net frames can be expensive, costing $46 or more. So, I decided to make my own for less. Here’s how I did it.
The Shopping Adventure
Armed with a plan, I headed to my favorite hardware store to gather materials. My primary supplies were three-quarter-inch PVC pipes and attachments. Or so I thought. When I got to the plumbing section, I was shocked. The corner and post fittings I needed were nearly $4 each! Price hikes threw a wrench in my plans, but this is where our first lesson comes in: adapting to change.
After some digging, I found half-inch PVC pipe and fittings that were significantly cheaper. Bulk buying also turned out to be a great option for those building multiple frames, like for a troop. Lesson learned: always have a backup plan and explore your options.
Planning and Measuring
With materials in hand, it was time to draw up the plans and measure everything carefully. The frame needed to be 42 inches tall to allow for comfortable sitting and had to fit the dimensions of my cot—26 inches wide and 36 inches for the center posts. Using 10-foot PVC pipes, I calculated how to cut the pieces efficiently without wasting material. A single 10-foot pipe could yield three 26-inch crossbars and one 42-inch post, maximizing every inch.
As any good scout knows, “measure twice, cut once.” Even so, I made adjustments along the way. For example, I initially forgot to account for the extra length required to fit the connectors snugly. This mistake taught me the importance of double-checking everything—another invaluable lesson for scouts.
Building the Frame
The assembly process was straightforward. The corners and T-connectors came together to create a sturdy structure. However, I discovered that some pipes needed to be trimmed slightly to fit perfectly. A pipe cutter made quick work of this, and soon I had a frame that was both functional and cost-effective.
One of the best parts of this project was the opportunity to teach scouts how to use tools and problem-solve. For instance, one scout learned the hard way about locking a tape measure to get accurate readings. These hands-on experiences are what scouting is all about.
The Final Test
With the frame built, it was time to test it out. Draping the bug net over the frame, I secured it under my mat to keep bugs from sneaking in. The result? A spacious, bug-free zone where scouts could sleep or even play cards comfortably. It worked perfectly, proving that being thrifty doesn’t mean sacrificing quality.
Lessons Learned
This project reinforced several valuable lessons. First, being thrifty is about more than saving money; it’s about creativity and resourcefulness. Second, plans can and will change, but with a little flexibility, you can still achieve your goals. Finally, teaching these skills to scouts—and seeing their excitement as they learn—is incredibly rewarding.
So, the next time you’re faced with a challenge, remember: adapt, plan, and enjoy the process. Let’s go Scouting, America!