Compass 101: Why Every Scout Should Know How to Use One

Hi Scouters!
Today, I want to take a few minutes to walk you through something every Scout should know—how to use a compass. I like to call this "Compass 101: The Basics of Using a Compass and Why You’d Want to Use One." Let’s dive in!
But first—Be Prepared. That’s what today’s skill is all about—being prepared, even when technology fails us.
Why Use a Compass in the First Place?
You might be wondering, “Why do I need a compass if I’ve got a phone in my pocket?” That’s a fair question. Phones today have GPS, mapping apps, and can give turn-by-turn directions. But here’s the thing—your phone isn’t always going to be reliable out in the wild.
Maybe your battery dies. Maybe your phone gets wet, dropped, or broken. Or maybe you're in a valley or dense forest where your GPS can’t get a clear signal. In those moments, a compass is your backup plan. It doesn’t require batteries, signal, or software updates. It just works—as long as you know how to use it.
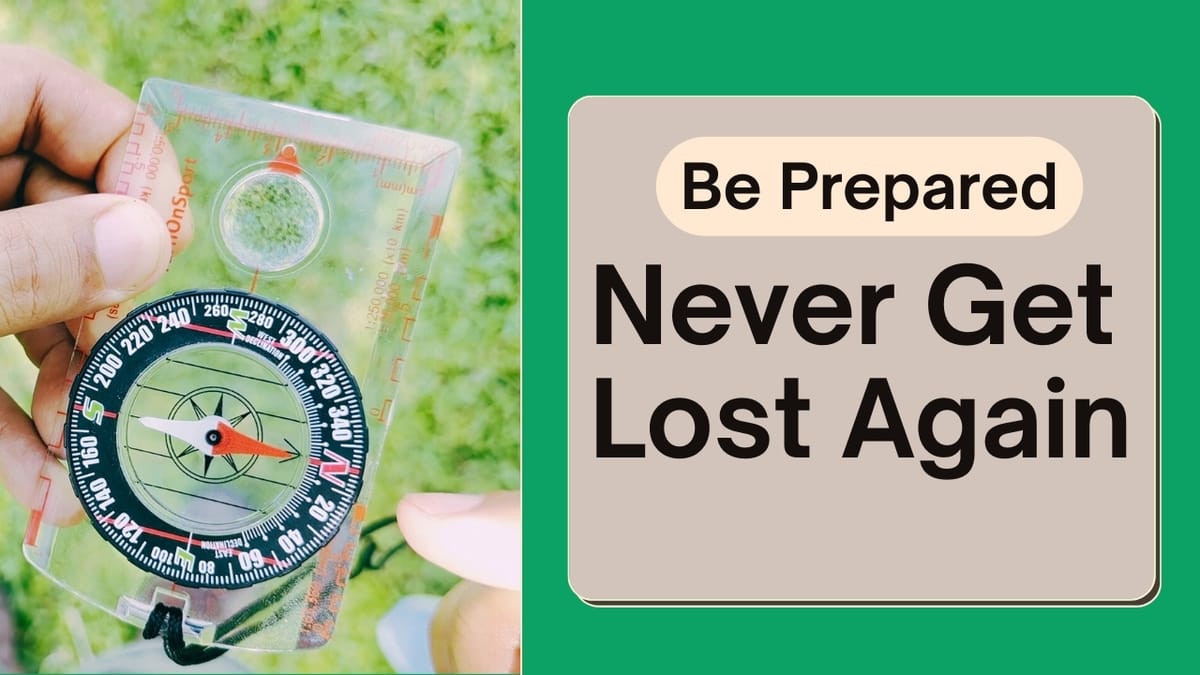
Meet the Base Plate Compass
Let’s talk about one of the most commonly used types of compasses: the base plate compass. This is the kind of compass many Scouts use, and it’s simple and reliable. Here are its four main parts:
- Direction of Travel Arrow
This is the arrow printed on the base plate of the compass. It points in the direction you want to travel. Clever name, right? When you’re navigating, you’ll line this arrow up with your desired direction. - The Dial (or Rotating Bezel)
This is the circular part of the compass with degree markings (0° to 360°) and cardinal directions (N, S, E, W). You’ll use the dial to set your intended bearing—especially useful when following a map. - The Shed (or Orienting Arrow)
This fixed arrow is found beneath the rotating dial and always points to the “N” on the dial. It often looks like a little house or shed, with a pitched roof. This is the arrow you’ll “put the needle in” when orienting your compass. - The Magnetic Needle
This is the floating needle in the center of the compass. One end is usually painted red to indicate north. No matter how you turn the compass, this needle always points to magnetic north. It's also nicknamed "Fred." You'll see why in a minute.
Tips for Using Your Compass
A couple of practical reminders before you start using your compass:
- Keep your compass level. If it’s tilted, the needle won’t float freely, and your readings won’t be accurate.
- Avoid magnetic interference. Don’t hold your compass near metal objects (like knives, belt buckles, or electronics) because they can affect the magnetic needle.
Let’s Practice: Finding West
Now, let’s practice going west using our base plate compass.
- Turn the Dial so that the “W” (for west) aligns with the direction of travel arrow.
- Turn your body (and the whole compass) until the red needle sits inside the shed—this is often called “putting Fred in the shed.”
- Now, with the needle in the shed and your direction of travel arrow pointing forward, you’re facing WEST! You can begin walking in that direction with confidence.
It’s that simple!
Be Prepared
That’s the foundation of using a base plate compass. I always recommend keeping one with you on every camping trip, hike, or outdoor excursion. You never know when you’ll need it. And remember—being a Scout isn’t about having all the latest gear. It’s about having the knowledge and skills to be ready for anything.
So the next time you're packing up for an adventure, tuck your compass into your gear. Because when the batteries die, the signal fades, or the trail disappears, your compass—and your skills—will be there to guide you.
Until next time, let's go Scouting America!